Introduction to the beeware IDE
Hi there ! Hope you're doing well ^^
Today we're going to approach the Beeware project. Even though, still in development, this project seems promising by allowing developers to create application on all current existing platform through the use of only one library. In this sense it appears interesting to approach briefly this new solution in a this simple tutorial in order to keep track of the current ecosystem development and be able to transition once this project will be completed.
But enough talking, let's get set up !
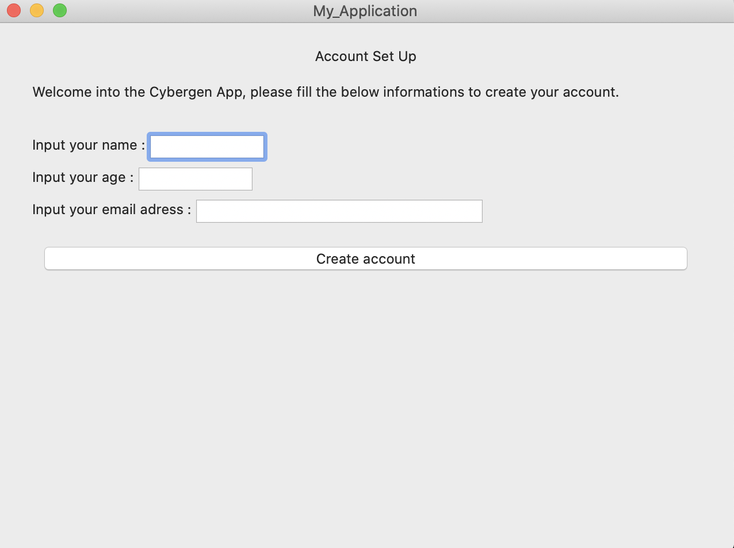
In order to present the Beeware solution we will in this tutorial create a simple account set up application as shown below :
To do so we will first need to create a new directory named "My_App" as well as a virtual environment named "My_App_venv" through the terminal as follows :

Code explanation :
The first line allows us to create our My_App directory in which we place ourselves with the second line using the "cd" keywords. Then once we are in our directory we create with the third line our My_App-venv virtual environment indise our new directory and then activate this latter.
From there, we install the beeware tools and libraries in our activated My_App-venv virtual environment as follows :

Now that we are set up and have all the required tools at our disposal, it is time to create our application. To do so, thanks to the Beeware library we just need to run the following command in our terminal :

At this point, briefcase will ask us for some details of our new application. For the purposes of this tutorial, use the following :
- Formal Name : My_Application
- App_Name : account_app
- Bundle : Accept the default value by pressing return
- Project Name : My_Application
- Description : Accept the default value ( or enter your own description)
- Author : Enter your name here
- Author's email : Enter your own email address
- URL : Accept the default value
- License : Accept the default value
- GUI framework : accept the default option
Now that we have a stub application, we can use Briefcase to run the application. To do so we'll first need to place ourselves into the "account_app" project directory and then run the project in developer mode :

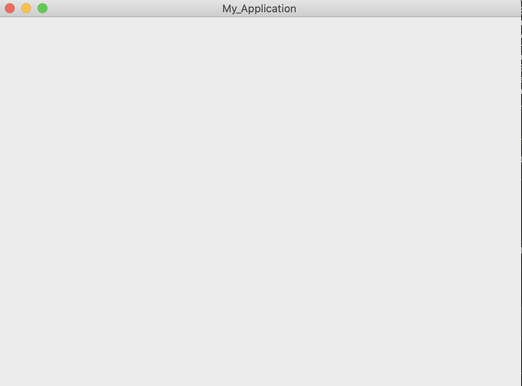
For now as you can see our app is a bit empty so let's code it.
To do so you'll have to get to the folder containing your application by opening the finder pressing (Shift + Cmd + G) and enter your path which should be something like :

Once you're in the right directory enter into your account_app folder then into src and finally the other account_app folder and open the app.py file using a text editor like XCode or Sublime Text.
Normally except for the code generated automatically by Beeware to create the core structure of our app, the My_Application( ) class should be empty like shown below :
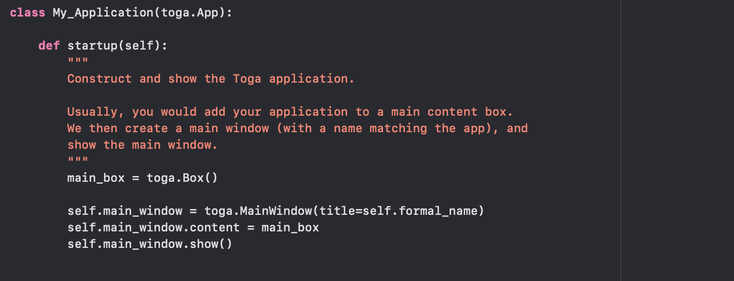
So now we're gonna fill our My_Application( ) class in order to create our little application.
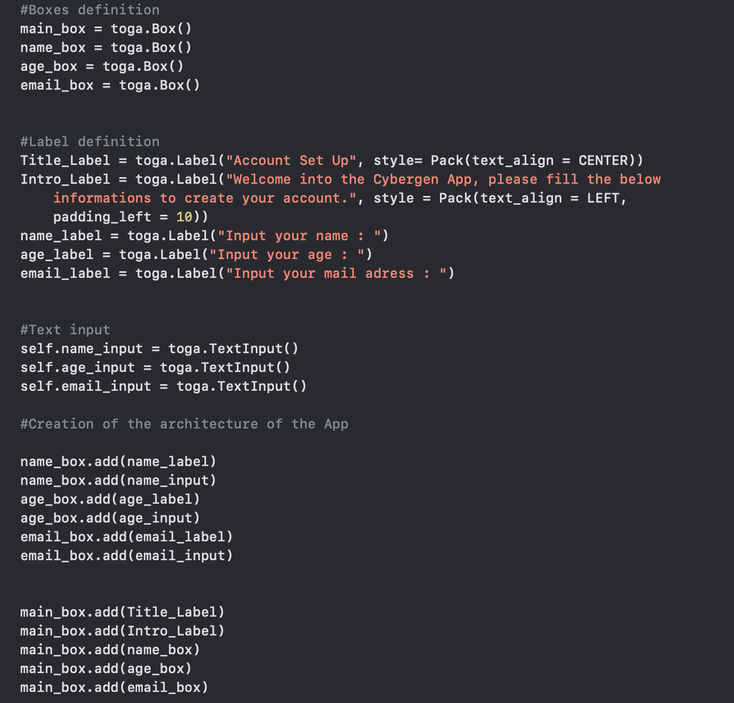
If you take a look back at the illustration of the app that I gave you earlier, you can see that we're gonna have to input a "title" called "Account Creation" and then put a little text of introduction explaining to the end user the actions to take. To do so, we will here have to create two label boxes with the right contents and then add those two boxes to our main box.

Now that we have the first part of our application, it is time to create the text inputs boxes asking the end user to enter his name, age and mail adress. To create those here we'll have to process a bit differently first we'll need two create three boxes :
- name_box
- age_box
- email_box
Then create the three corresponding label as shown in the prior illustration :
- name_label = 'Input your name'
- age_label = 'Input your age '
- mail_label = 'Input your email adress'
and create the input text boxes :
- name_input
- age_input
- mail_input
before finally grouping the labels and input box into each corresponfind boxes as follows :
- name_box = [ name_label + name_input ]
- age_box = [ age_label + age_input ]
- mail_box = [ mail_label + mail_input ]
To sum up your code should look like this :
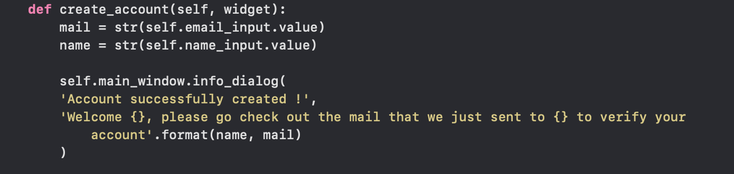
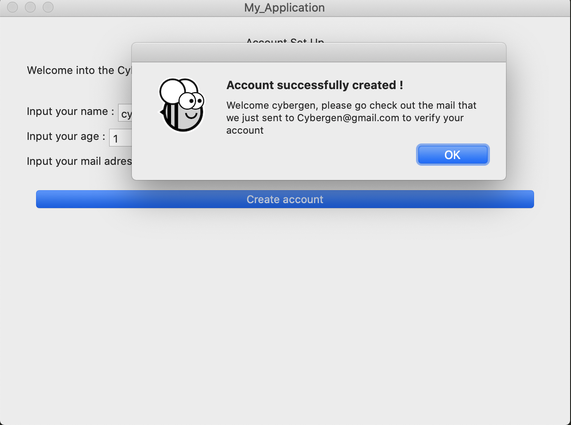
Now that we have most of our application done, the last part to create is the "Create Account" Button creating a pop up window with a sucess message and a quick summary of the state of the account all the info were correclty provided by the end user.

Now you should dispose of a working app which run fairly well in developper mode. However, the idea being to have a working app we're not going to ask our potential users to create a path, install a virtual environnment and so on. Consequently, with the help of the briefcase command we're now going to package our application in order to just give to our user a simple installer working all on its own.
So going back to the terminal window, and making sure that you're still in your application with your virtual environment activated, you're now gonna run the following command :

You should now see now see a new MacOS folder in your MyApp directory containing your app and an installer executable that you can send to anyone to install your app.
Now pushing things forward, if you want to create a mobile version of this app you just have to repeat the previous set of command but this time specifying that you want to create your app on iOS as showed below :

And that's it ! You now have at your disposal two versions of this app running on MacOS and on iOS.
However before pushing it further on your own, it is important to keep in mind that this project is still under development and don't really work for Android for now so if you want to start building a real application for now it would be wiser to stay with the usual way of developping : Swift for iOS and Java for Android.
Still, I tried to implement the summarizer code that was presented in the Summarizer tuto part 1, so if you want to get a go at it you'll find it, for now, on the github page of this tuto as I'm still working on debugging the code that is working in developer mode but not anymore in its final version once the packaging of the app is done.
As always the whole code for this tutorial can be found on the website github page.
Hope you find this tuto interesting ^^
See you next time !

All information/documents contained in this website rely solely on my personal beliefs, and do not constitute professional investment advice.
Be careful in your investment and do not invest more than you can afford to loose.
Contact :
e-mail: christophe.richon.pro@gmail.com