
Artificial Neural Network Part 1 : Basics
Hi there ! Good to see you again 😃 !
Today we're gonna move to a new type of models called Neural Network and as in the case of the SVM we will take a progressive approch by introducing at first the exisiting library put at our disposal by Python 3 and then dig deeper by creating our own models to try to create more efficient models.
But for now let's take the easy road and learn a little bit more about the keras library 😉
1. First, what is the keras library ?
Keras is a very handy python library which enable its user to use pre-trained models such as :
- ResNet50
- Xception
- VGG16 / VGG19
- InceptionV3
- . . . .
By the way it also allows you to perform fine-tuning or transfer learning based on those models in order to get a more reliable model for a given problem. So as you can see, this library is really a mine of gold for performing basic artificial neural network coding and get a first idea of the potential efficiency of a particular network architecture.
2. How to use the Keras library
Now, let's get our hands dirty and open python 🐍
First to be able to follow the rest of this tuto you will need to have the keras library so if you don't already have it install it via pip :

Now all we have to do is to choose a model and load its pretrained weights to be able to test the model on a random data. For example, if we take the ResNet50 model and use a picture randomly choose on the imagenet database we can obtain an accuracy level of more than 99% as shown below :
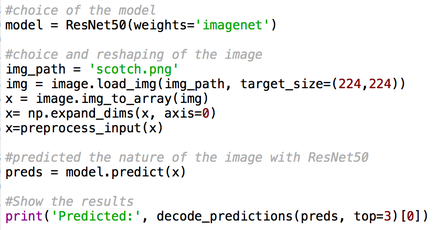

Note : Here to be able to use the ResNet50 model we must reshape a little bit our picture in order to fit the requirement of the model specified about the input shape of 224 x 224 etc ( see here for more details )
3. To go beyond . . .
Now that we know how to call a random pretrained model and put it in motion using keras let's go a little bit deeper and try to do a quick fine tuning of the ResNet50 model. To do so, we will use the MNIST data which is a handwritten digits dataset created by a joint effort of the NYU, Google Labs and Microsoft and already implemented inside the keras library. Now, let's reshape our data :
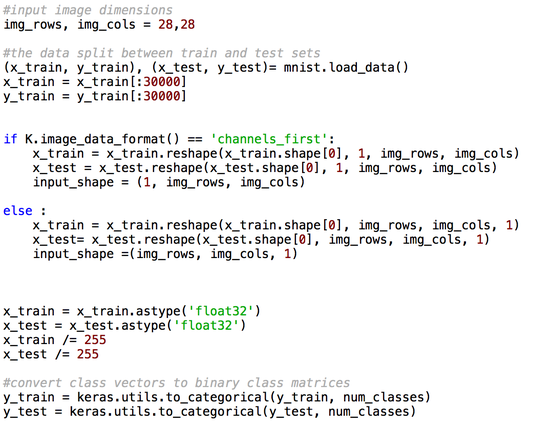
Let's explain a little bit the previous code. In a first time we load our training and test set from the keras library using the load_data( ) function. Then, in order to ease a little bit the computational burden for our computer we select only 30 000 out 60 000 data for our training set. Moreover, if you go check the details of the MNIST datset here, you'll see that the pixel value, which represents the degree of blackness of a given pixel, is an integer between 0 and 255, so by dividing by 255 we get a value between 0 and 1 which is easier to work with. Also for our outputs y_train, y_test we are using here the keras.utils.to_categorical in order to get a matrix of 10 values such as :

Note : The if else loop is dealing with the difference of dimension between TensorFlow and Theano and readjuste our data automatically depending of the used framework. However, as it is not vital to understand in details this problem in the scope of our tuto we wil treat it as a black box but if you want further details about this subject you can take a look here.
Now that our data are set, we have to create a our model. Below I give you an example of fine tuning however, as you'll see if you run the code, the time of computing is extremely long for a laptop or a normal computer so I'll promptly encourage you to think about solutions such as Amazon EC2 if you're planning on going deep in artificial neural networks and don't want to burn a lot of cash on hardware. . .

And that's it for this time but don't hesitate to play around with the keras library and more importantly to try with other data and other models to really understand trough practice the ins and outs of the keras library and as always for those interested you can find the full code of this tuto right here.
See y'all ! 😃

All information/documents contained in this website rely solely on my personal beliefs, and do not constitute professional investment advice.
Be careful in your investment and do not invest more than you can afford to loose.
Contact :
e-mail: christophe.richon.pro@gmail.com