
Introduction to Colaboratory
Hi there, hope you're doing great ! ^^
Today we're going to approach a cloud tool which will become pretty handy in your data science journey if you want to dive a little bit further into deep neural network : Google Colaboratory.
But what is Google Colaboratory ?
Google Colaboratory or colab is a google research project created to help disseminate machine learning education and research. Technically, it is simply a free online Jupyter notebook environment requiring no prior set up which runs entirely in the cloud.
Moreover, it allows its users to dispose of a free acces to a GPU and TPU at the only requirement of having a gmail accounts. So as you can see, it's a pretty sweet deal especially if you want to start experiment with neural network and have a go in training different models without having to pay at first or turn your laptop into a tea kettle.
By the way you can also mount your Google drive in Colab in order to upload easily data files and share it with your friends or access it from anywhere which can come pretty handy at times.
Getting started with Colab ?
First if you don't have any gmail account you'll have to create one here.
Once you're connected to your google account go to your google drive and create a new folder that we'll call Machine Learning and inside the latter a new folder called Test.

Once you're in the right folder, do a right click, select more and double click on Google Colaboratory

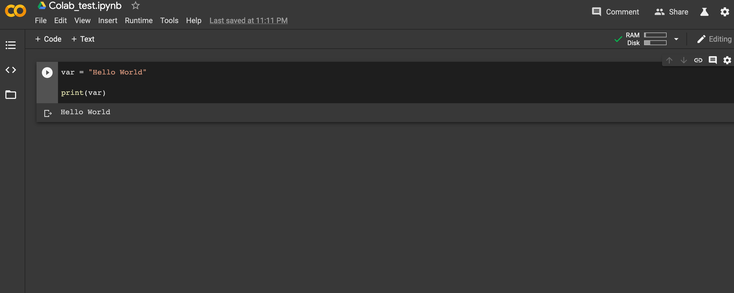
Congrats you're now in colaboratory ^^ and as you can see, it's pretty similar to a jupiter notebook. Now to start using the environment it's pretty simple just write some code in the code cells and click on the arrow on the left to run it or press Ctrl + Enter (see end of the articles for a summary of useful colab shortcuts).
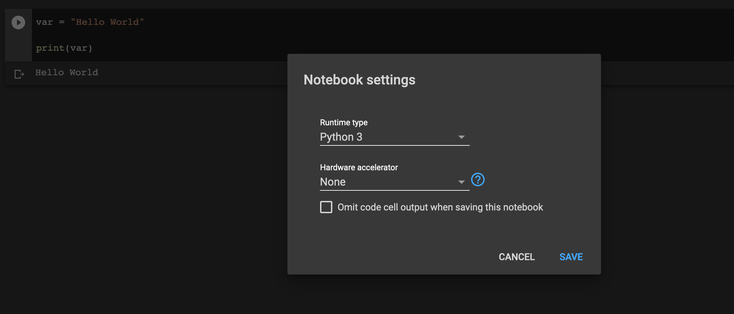
To change the name of the file you just have to click on it and rename it as you want and it will automatically be updated in your drive as soon as you save the colab file. But let's get to the most important part, how to set up the GPU. In fact, it's pretty simple, indeed you just have to click on runtime, go to modify runtime type and then select the version of python that you desire and select GPU in the section underneath.
And normally you're good to go to start enjoying the power of GPU processing free of charge ^^
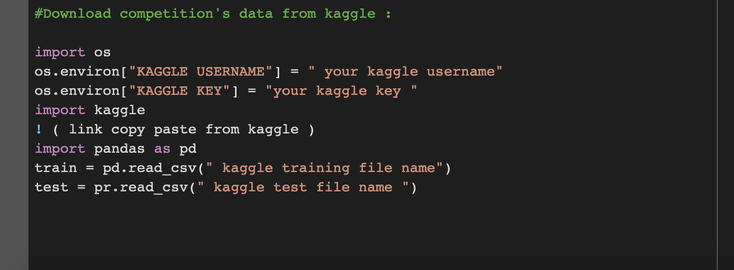
By the way just in case you're in need for it, just as I was when I started to work with Colab, and to save you the hassle of searching on the web how to import data in Colab and stuff I put you below the basic scripts to perform the most common actions in colab :

And that's it for today ! So as always keep playing around with it and don't hesitate to change stuff or try other methods if they suits you better.
Happpy coding ^^

All information/documents contained in this website rely solely on my personal beliefs, and do not constitute professional investment advice.
Be careful in your investment and do not invest more than you can afford to loose.
Contact :
e-mail: christophe.richon.pro@gmail.com