
MetaMask connection button ( January 2021 API update )
Hi there, hope you’re doing great today ! 😃
As you may know, Metamask recently stopped supporting web3.js and made some major changes in their window.ethereum API, as such I thought that it could be
interesting to review most of these changes by creating a Metamask connection button in order to both see how to create those kind of functionalities for people new to this and see how to
implement the recent changes for people already in the know who have to now update their Dapps 😅
Alright, so first you’ll need to copy this github repo (link here) as follows :

Now that we have everything on our local desktop, let’s make a quick tour to get a better grasp of it.
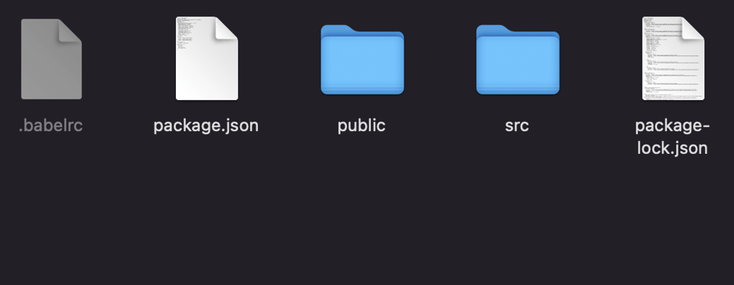
As you can see we have two main folders :
- “public” which contains our index.html and manifest.json files
- “src” which contains our index.js file, all the png files in the “logos” file and our components files where we store all our main react.js files allowing us to create the layout and all our features (connection, ETH sending … )
Alright so now, run npm install in your console in order to install the dependencies.

Once it’s done, run npm start to get a preview of the Dapp that we’re going to build.

As you can see, in order to build this pretty basic Dapp we will need to retrieve :
- Our Metamask account address
- Our account balance
- The ChainID of the network that we’re connected on
- Create a request to send ETH to our own account
Alright so first thing first, let’s retrieve our account address. To do so, open the App.js file in components, get to the first start coding flag and copy the following code snippet :

As you can see to be able to request information from Metamask we now have to use directly window.ethereum and make a request composed of two elements
:
- The method that you wish to use
- The Parameters (params) that are necessary to the execution of this method which have to be specified as an array.
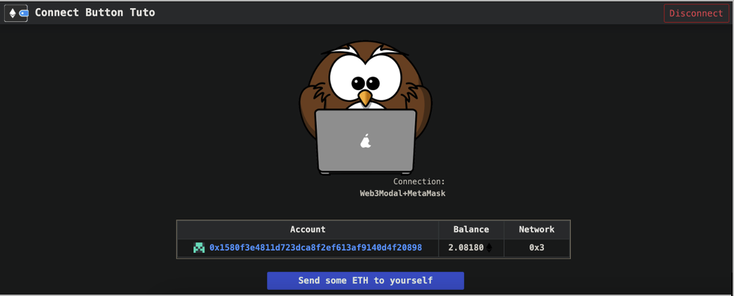
Now if you go in your web browser, and click on connect, normally now you’ll be able to see your account address, your balance and the chainID of the network on which you’re connected.

However, things are not finished !
Indeed, if you change your selected account in MetaMask you’ll see that you’ll lose the balance and that the same behavior repeat itself when you change the network.
So in order to take care of that problem go to the flag 2 and copy the following code :

Here if you refer to the coding file, you’ll see that prior to using this code snippet requesting again the account address of the current user we specify that the execution of this code should only happen in the case where an account changed Event is witnessed :
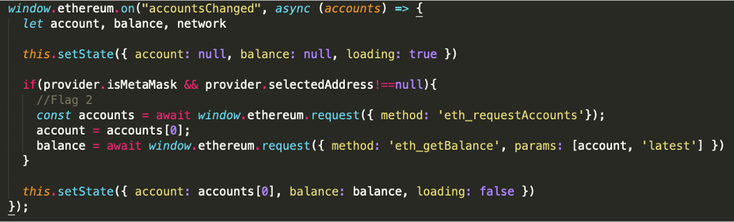
This way we are able to update automatically the account address in our Dapp whenever the user is switching between his MetaMask accounts.
Once it’s done go to flag 3 and copy the following code :

Here the idea is the same as previously just we ask to wait for a chainChanged Event before updating the value of our network ID.
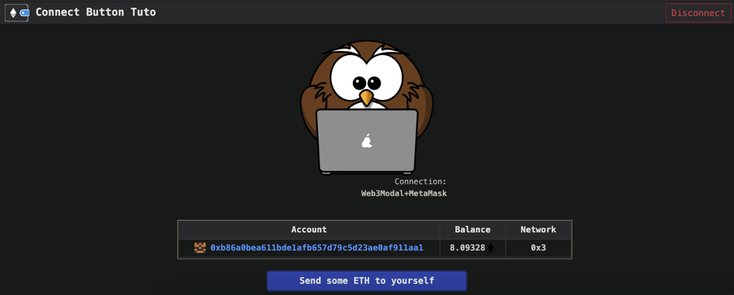
Alright, so now if you go back to your browser and try the Dapp you’ll see that we are now able to change our account and our network and that the Dapp is
automatically updating itself according to our choices in MetaMask.
Pretty cool !
Now, about the sending ether button…
Here we’re going to have to use the eth_sendTransaction method. To do that, we need to first create first an option object that we’ll then use inside our eth_sendTransaction as our parameters. So first, go to flag 4 and copy that code snippet :

As you can see this object is summarizing all the details needed for our transaction execution on the Ropsten test network.
Note : I’m using here the Ropsten test network as you can see ( chainId: ‘0x3’) but feel free to use the test network of your choice 🙂
Now go to flag 5 and copy this code :

And you normally have everything now to successfully send ETH to yourself. So let’s try it out, go to your browser, click on the send button, validate the transaction on Metamask et voilà !!

And there you have it, you now have a template for creating a connection button with the brand new MetaMask specification.
So I hope that you enjoyed this tuto and that it helped you to either learn how to create a MetaMask connection button or understand better how to switch from the
web3.js config to the window.ethereum ones.
🚨🚨 Also stay tuned as a follow up tuto based on this one will come shortly where we implement WalletConnect in addition to MetaMask as a potential wallet option for our end user.
In the meantime take care, and I'll see you on the next one ✌️

All information/documents contained in this website rely solely on my personal beliefs, and do not constitute professional investment advice.
Be careful in your investment and do not invest more than you can afford to loose.
Contact :
e-mail: christophe.richon.pro@gmail.com