Create your first ERC20 token ( part 3 )
Hi,there ! Welcome to this third and final part of our ERC20 token tutorial 😃
Today, we're going to create our ICO webpage in order to enable end users to interact with our token and buy it through a simple and nice interface.
Here, is the Github repo that you'll need to clone in order to follow this tutorial.
n.b. Don't hesitate to go to take a moment to discover it and become a bit familiar with it.
⚠️⚠️ Important note ⚠️⚠️
For this client side interface we will use the Metamask wallet running on the Chrome browser so before starting this tutorial download Metamask and Chrome.
=> Here is a tutorial on how to set up metamask on Chrome.
Before going further with the tutorial don't forget to open the console and run the "truffle migrate --reset" command in order to migrate the back end part of the project on the local blockchain powered by Ganache 😉
Alright, now that we're set up go to the console and run the "npm install" in order to finish install all the node packages on your packages it should take around 1-2mn to load.

Once it's over, run the npm start command it will call your default web browser and show you the current state of our ICO webpage

Tip : Once you run npm start if you operate modification in the html code, the page will automatically refresh to reflect those on the web page. However if you want to stop the process in the console you just have to press Control + c.
As you can see, our interface is still pretty basic so let's start to customize it a bit. First we want to change the name appearing in the tab. To do so go into the project folder and open in Sublime Text the index.html file located in the public folder. There change the title to "Token ICO homepage"


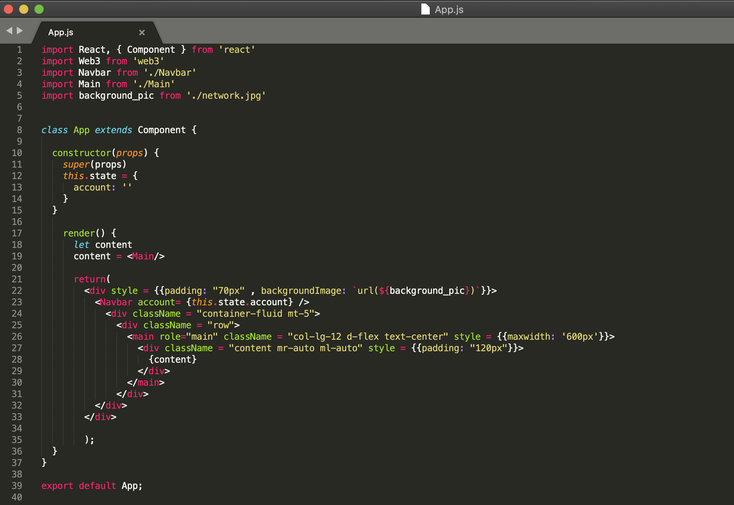
Now, let's customize the content of our webpage. First we'll create the shell of our webpage by going into our App.js file and introducing our Navbar and our Main component in our render function.
Alright, so now that we have the shell, it's time to start building the graphic interface of our web page. To do so go into the Main.js file and copy the following code :
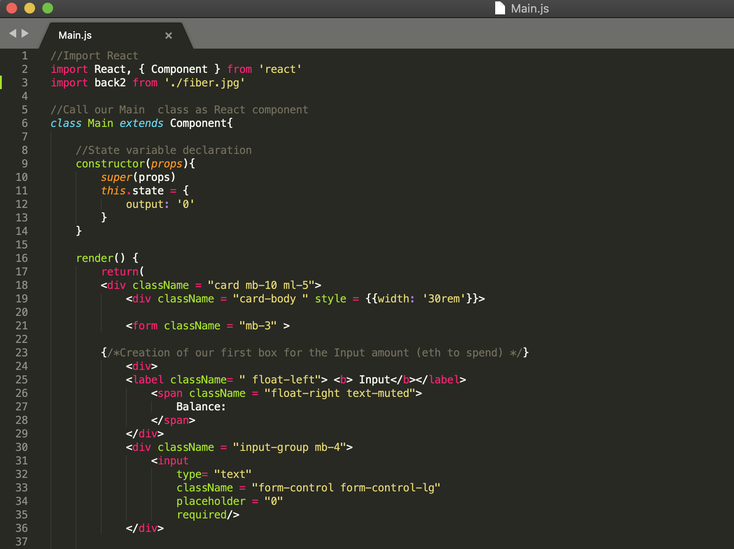

Code explanation :
- First we import React and declare our Main class as a react component in order to being able to call it in our App.js file and display our user interface on our webpage
- Second we create our user interface (see the comments in the code)
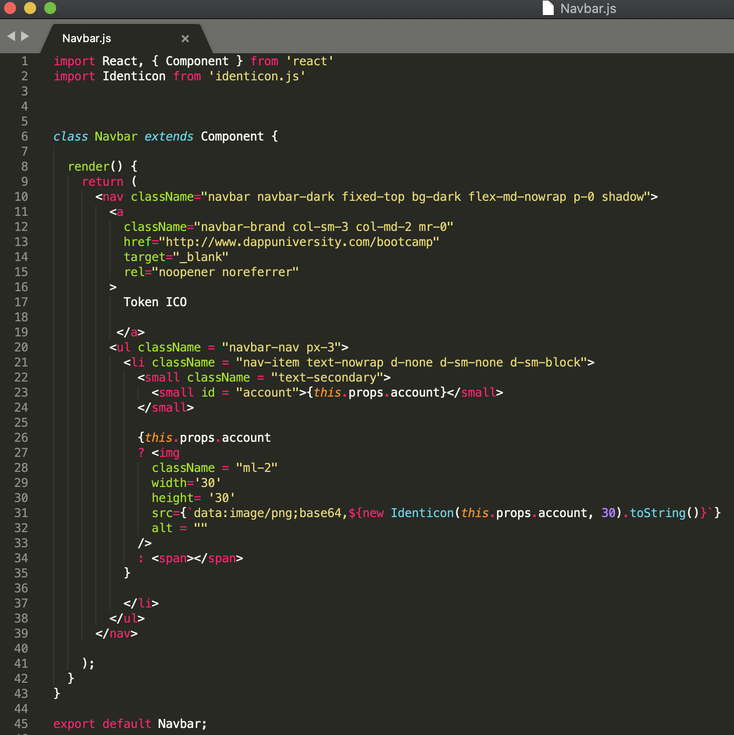
Now, go into the Navbar.js file and replace the comment code by the name of your ICO.
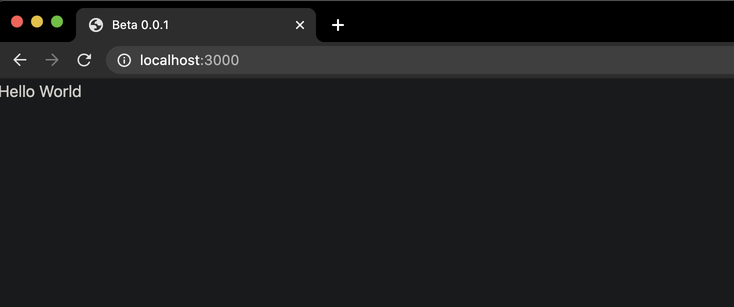
Once it's done your web interface inside your browser should look like this :

Looks pretty cool ! So, that's a good first step but for now this interface can't do anything and is not connected to our contracts on the blockchain so let's do just that. Firstwe have to import an account from Ganache into Metamask, to do so follow the following steps :
- Go into Ganache
- Click on the key logo on the right side of the first address
- Copy the private key
- Go back in Chrome
- Click on the Metamask logo (the little fox)
- There click on the circle logo on the top right of the metamask window
- Choose import account
- Select private key in Selection type
- Paste your private key from Ganache
- Click on Import
Once you connected your Metamask wallet to your ganache session, go back to the App.js file and add the below code in the App class above the constructor in order to import Web3

Now that we have the right Web3 version at our disposal we can create our loadBlockchainData function in order to load up inside our user interface our contracts and define all our state variables allowing us to display useful informations such as the ETH and Token balance of the user.
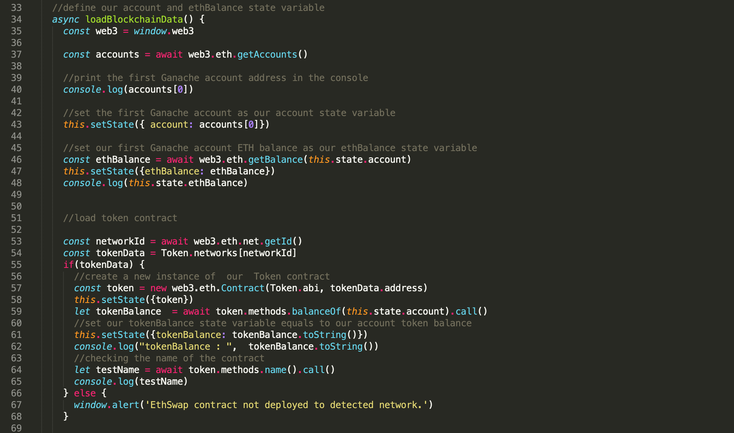
Now, if you go into Google Chrome and open the developer console by using the shortcut Option + Command + J you'll see that we indeed retrieve some useful informations from our contracts
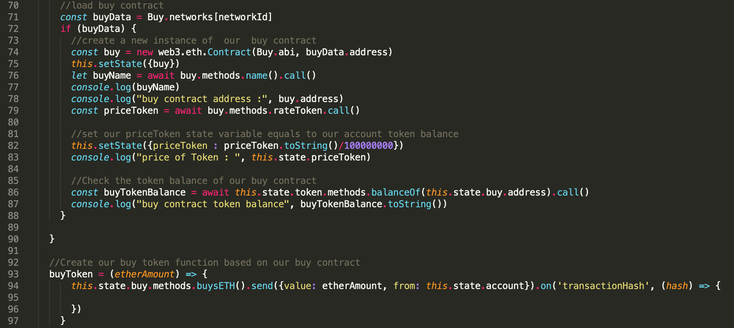
Alright, so now that we sucessfully connected our client side to our back end it's time to display useful informations such as token price, user balances in our user interface. To do so go into our Main.js file and update our render function as follows :
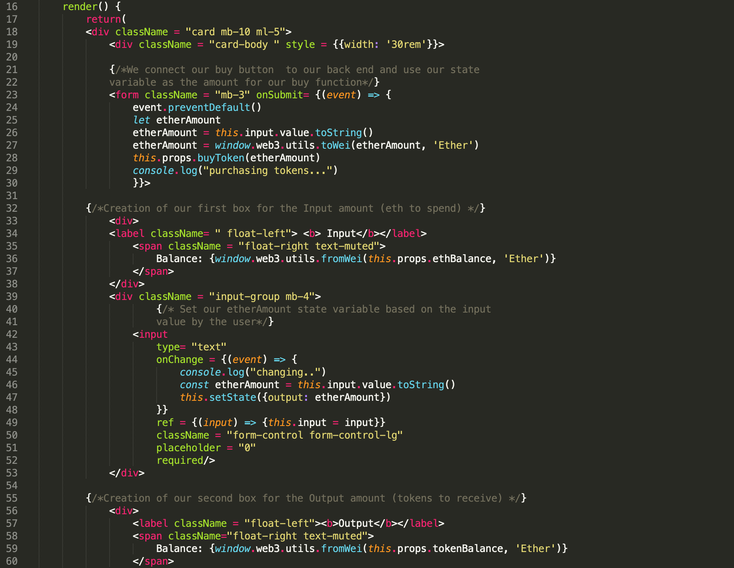

Then go back into the App.js file and modify the Main element as follows in order to allow the Main element to use the functions and state variables define in the App element.

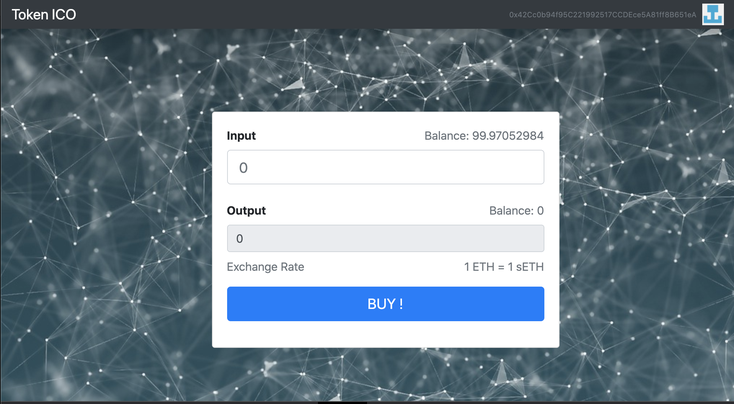
Alright, we're fully set up so go back to the web browser and you should now see the following display of our user interface
So now comes the moment of truth 😅 let's test it and try to buy 2 sETH
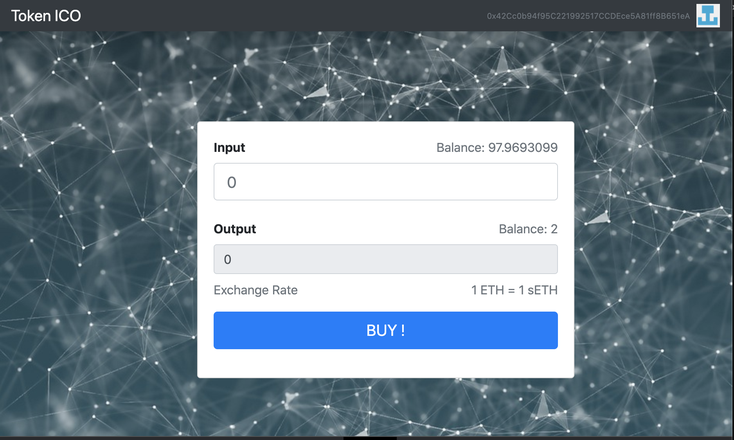
And it's working !! 🥳🥳🥳
So congrats if you suceed in creating this ICO interface, you made a big step towards the blockchain ecosystem. However don't hesitate to try to play around with this this project by adding new tokens, changing the exchange rate or even modifying the display of this user interface in order to get a deeper understanding of this project.
As always full code can be found here at my Github page.
More tutorials will come in the weeks to come so stay tuned and in the meantime happy coding ! ✌️

All information/documents contained in this website rely solely on my personal beliefs, and do not constitute professional investment advice.
Be careful in your investment and do not invest more than you can afford to loose.
Contact :
e-mail: christophe.richon.pro@gmail.com